Page 2 of 5
Re: Dash fabrication
Posted: Mon Sep 21, 2009 8:28 am
by John_Heard
My brother in law runs a scrap yard, yes it's sad to see all that aluminum that could be used to make stuff with get melted down.
Re: Dash fabrication
Posted: Mon Sep 21, 2009 9:07 am
by wikd69
pro70z28 wrote:I could throw some gussets on there.

It's stuff I found on the salvage side of the local steel supplier, so I have to use what's available. Sadly the pickins are slim these days. The yard is usually full of steel, SS & aluminum that can be bought by the Lb. But not Ann E. Moore.
Can I come over to your house and play ? You have a *lot* more toys than I do...

Re: Dash fabrication
Posted: Mon Sep 21, 2009 9:51 pm
by pro70z28
wikd69 wrote:pro70z28 wrote:I could throw some gussets on there.
It's stuff I found on the salvage side of the local steel supplier, so I have to use what's available. Sadly the pickins are slim these days. The yard is usually full of steel, SS & aluminum that can be bought by the Lb. But not Ann E. Moore.
Can I come over to your house and play ? You have a *lot* more toys than I do...
sure
Re: Dash fabrication
Posted: Mon Sep 21, 2009 10:34 pm
by wikd69
pro70z28 wrote:wikd69 wrote:
Can I come over to your house and play ? You have a *lot* more toys than I do...
sure
Cool beans :)
Re: Dash fabrication
Posted: Sun Sep 27, 2009 7:07 pm
by pro70z28
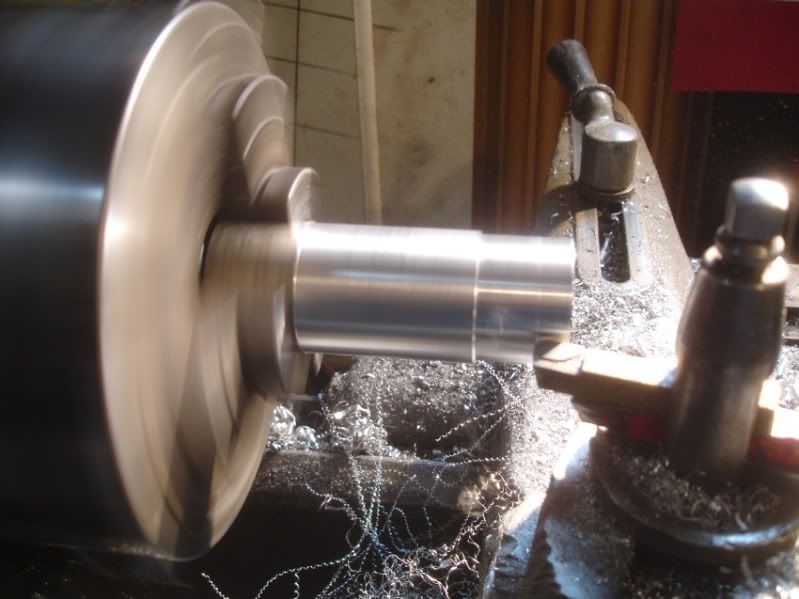
Got a little more done on the English wheel yesterday. A guy I talked to on the phone that builds E-Wheels said if I build one it needs to be very sturdy & needs a lot of adjustment built in. So, this is what I came up with for the top anvil. It's a little more complicated than it needs to be, but I had a couple old air actuated hydraulic cylinders laying around that I wanted to make use of. I got them for free probably about 30 years ago and finally decided it's time to use what's left of them. I found one of the cylinder housings was corroded through but the ram was still good & that's what I needed for the anvil adjuster. Too bad they are shot, the cylinders are all aluminum (except for the ram).
Anyway here's the deal. I cut a couple sleeves out of aluminum round stock for the rams.
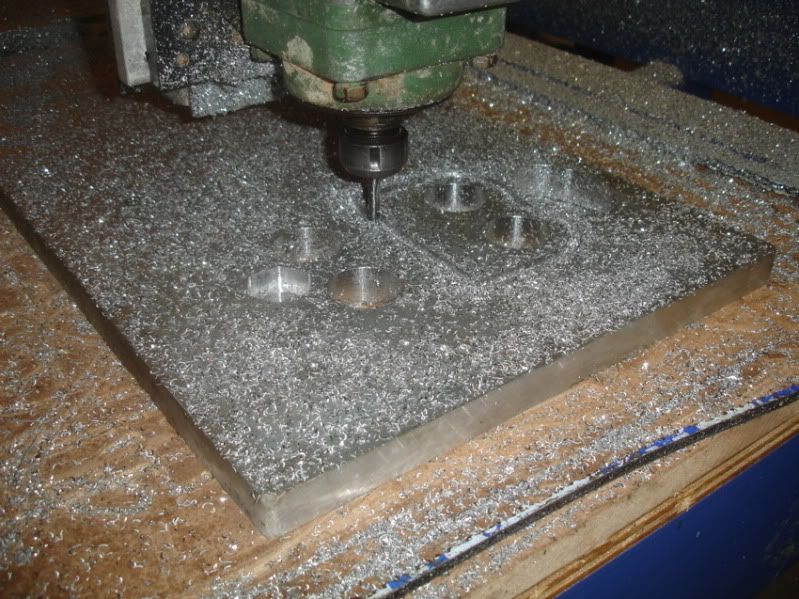
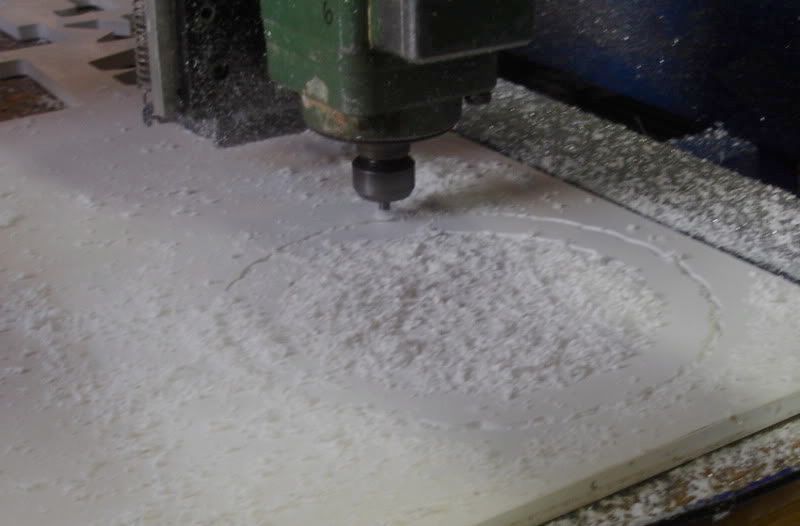
Cut a couple supports for the sleeves on the CNC
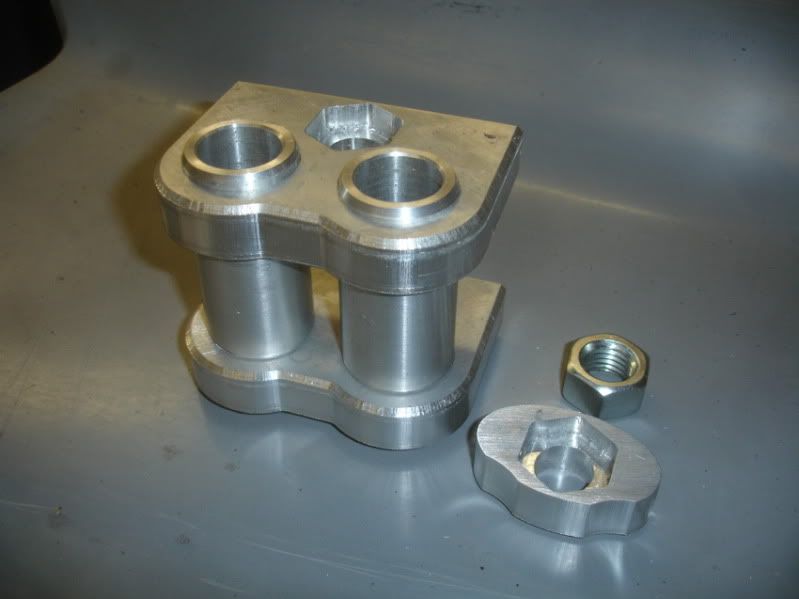
Parts pressed together. I didn't want the anvil assembly to rely on threads cut in aluminum, so I made this little pocket to hold a nut for the 3/4" ready rod that will be the adjusting screw.
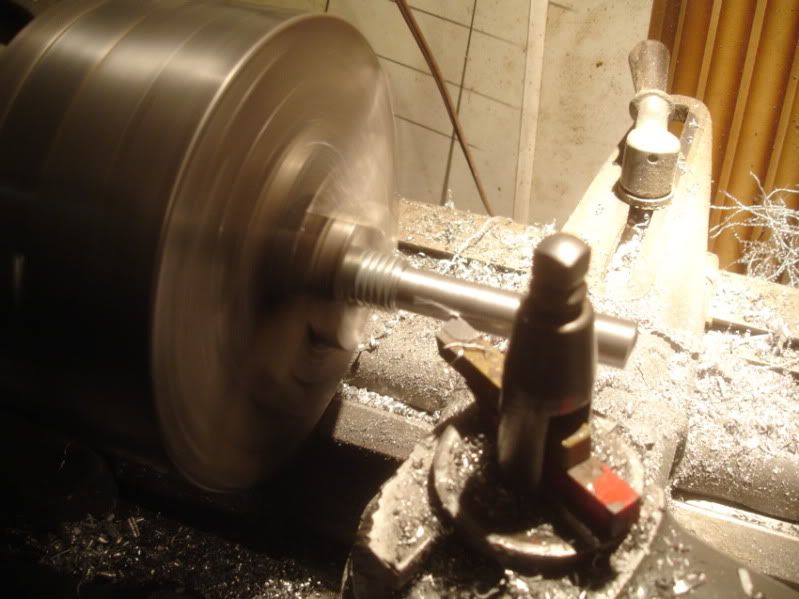
Turning part of the ready rod down to 5/8'' to make an adjuster out of it.
Re: Dash fabrication
Posted: Sun Sep 27, 2009 7:08 pm
by pro70z28
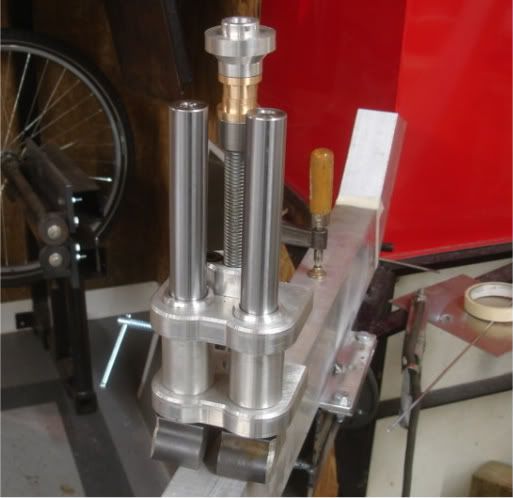
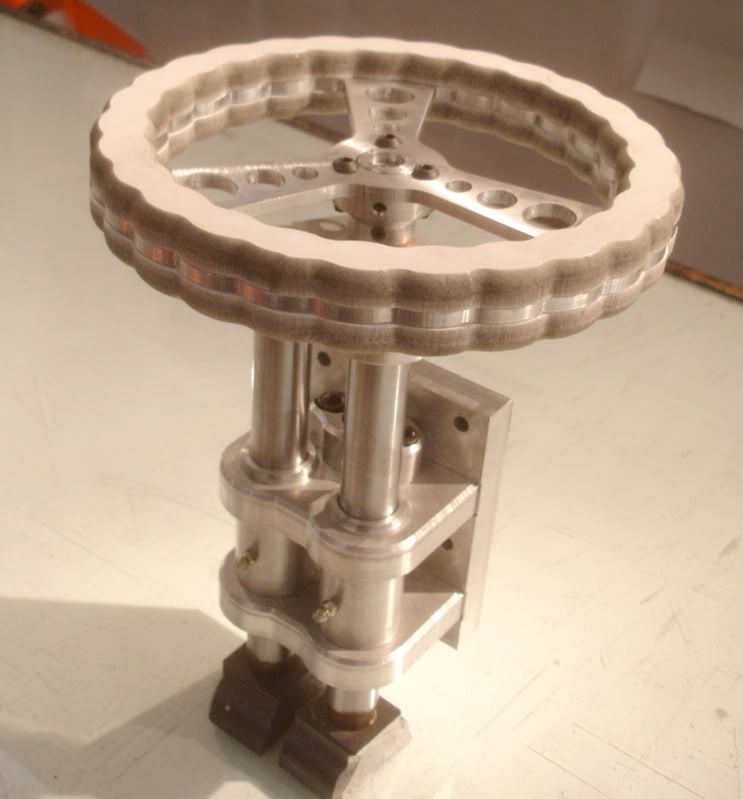
Here's where it's at so far. I have those cylinder rams cut to length. Turned a hub for the adjusting wheel that will be mounted on top. There will be a plate where the brass bushings are to tie the assembly together. Got a wheel and mounting flanges to make yet and the top anvil part of the project will be done.
I found some aluminum at the salvage yard that just said "I want to be an English wheel". I am building it to fit in the receiver I have on the wall for the other attachments. So, aluminum will make it a bunch lighter when I attach it to the wall to use. Old guys have to consider these things ya' know.
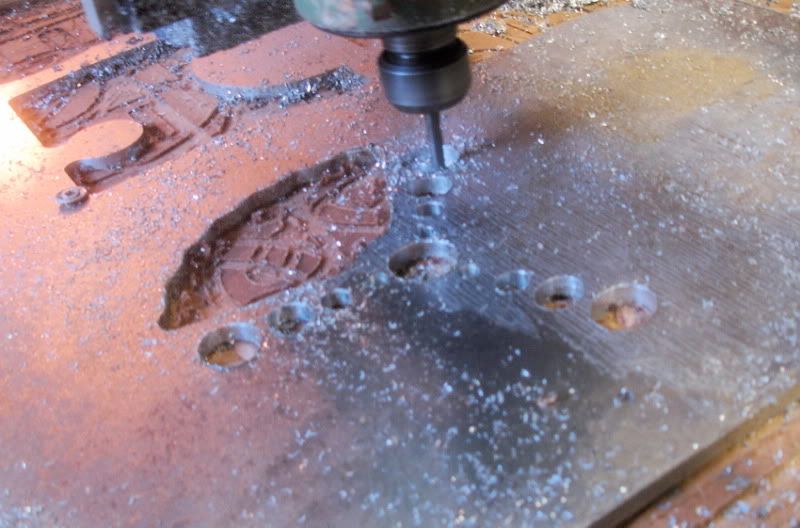
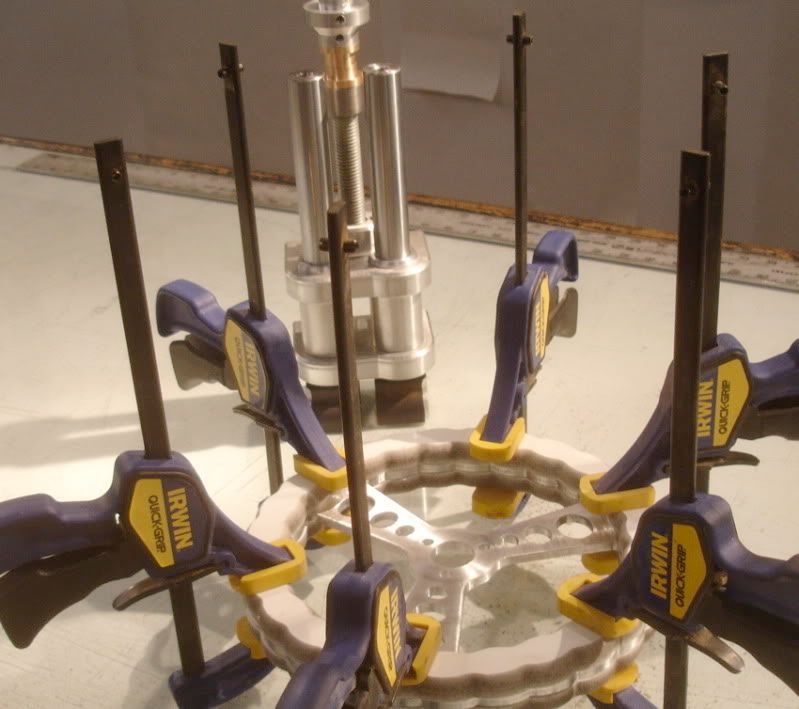
Had some time to kill his afternoon so I drew up & cut out the adjuster wheel for the E-Wheel.
Cut the hand grips out of 1/2" PVC.
1/4" aluminum for the wheel itself.
Used fusor auto body panel adhesive to glue it all together.
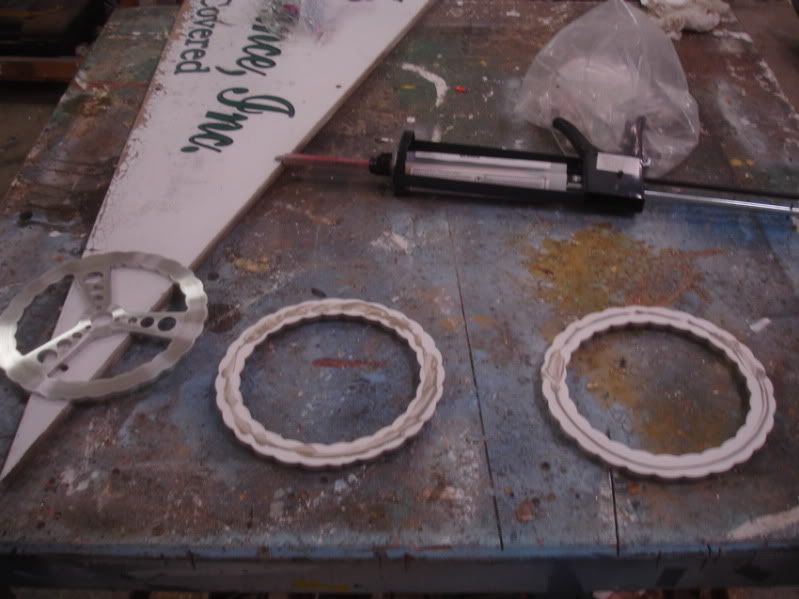
Like Norm Abram says ''I'll let it cook in the clamps overnight''.
Re: Dash fabrication
Posted: Thu Oct 01, 2009 8:32 pm
by pro70z28
Got a little more done tonight.
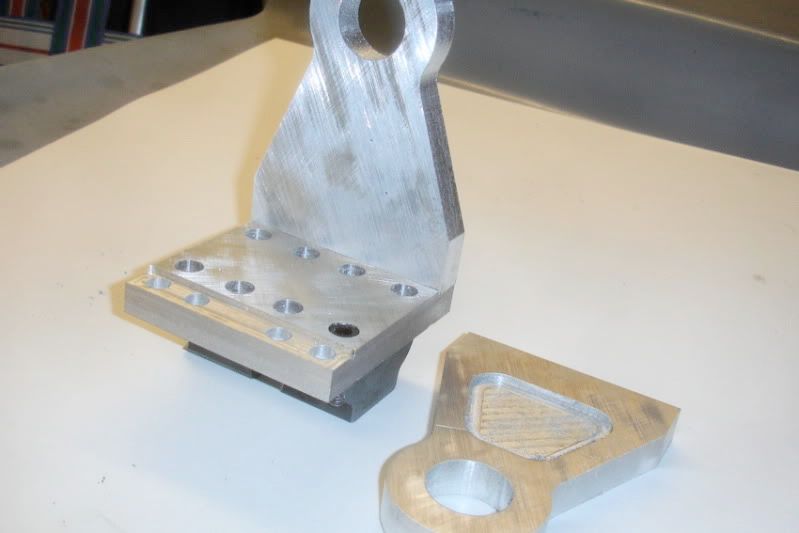
Cutting out the backing plate. The slots are to index the backing plate to the adjuster assembly.
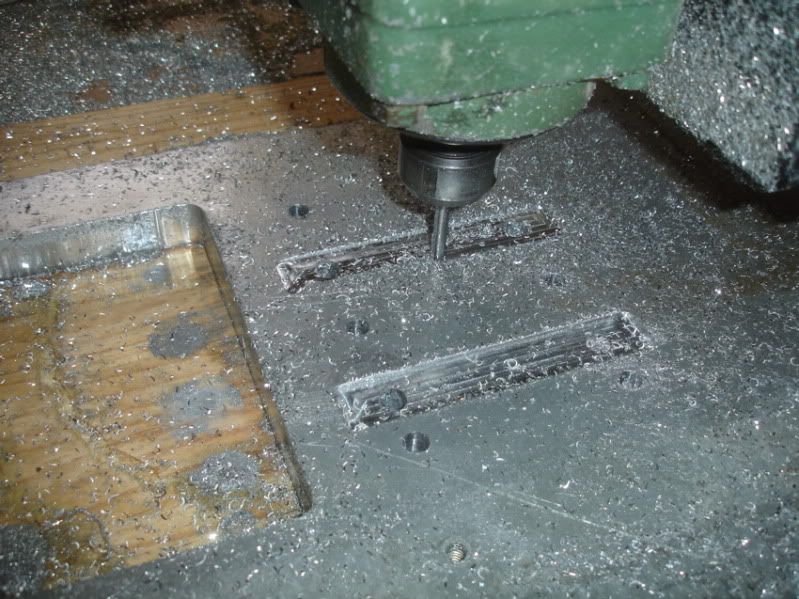
Cutting out the top cap that connects the ready rod to the rams.
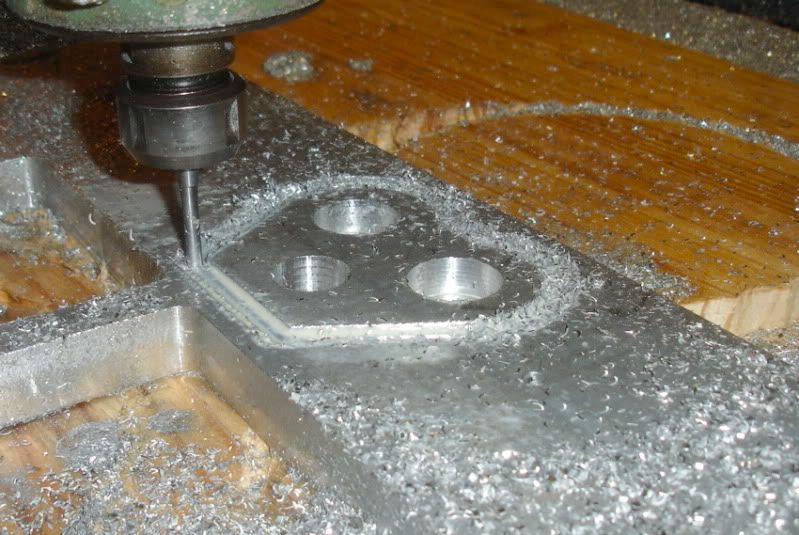
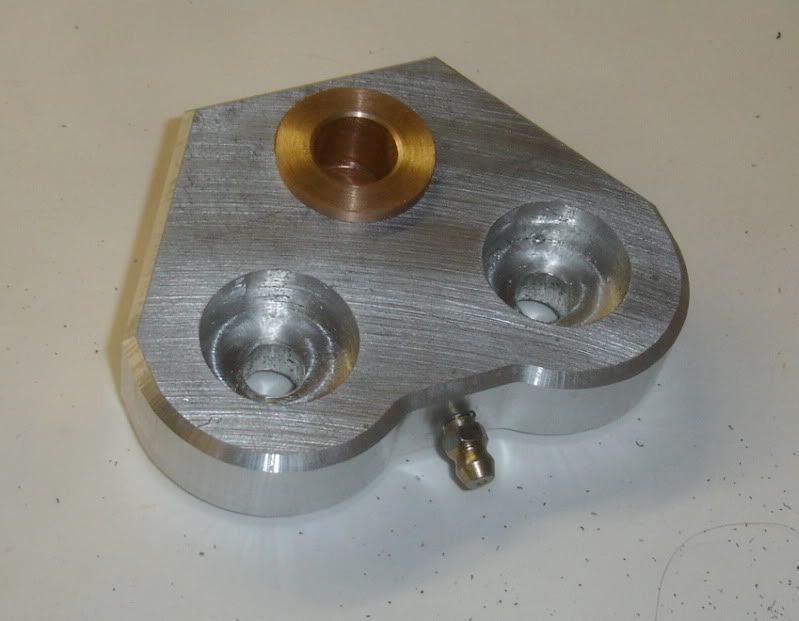
Top cap completed. The brass thrust bushings are pressed in from the top and bottom. They come about .020 short of touching each other. This allows grease to be pumped in from the grease fitting.
Assembly is pretty close to done. This shows the index slots that align the backing plate to the assembly.
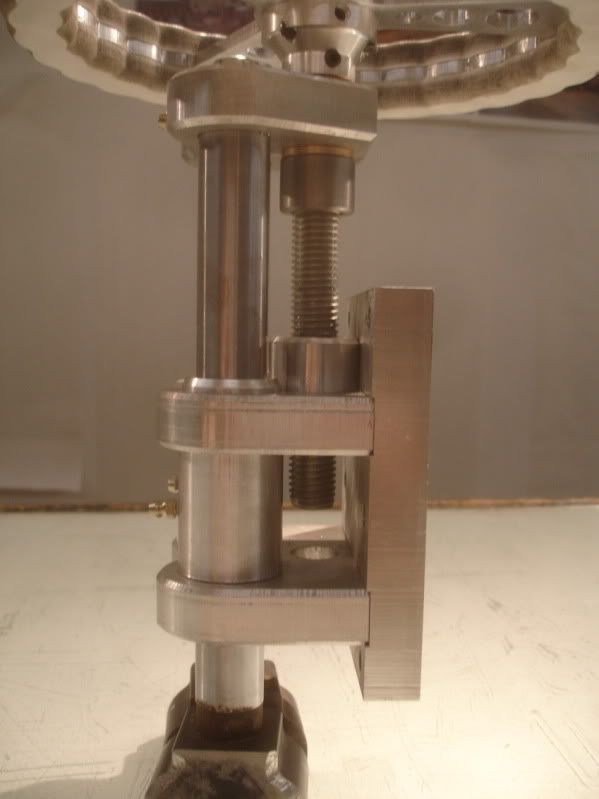
I also added a grease fitting to each ram cylinder just to keep everything workin' smooth.
Re: Dash fabrication
Posted: Fri Oct 02, 2009 6:17 am
by John_Heard
You're having too much fun there... Looks real nice!
Re: Dash fabrication
Posted: Fri Oct 02, 2009 7:06 am
by pro70z28
Thanks John, I DO need to get back to the "Z" when this thing is finished.
Re: Dash fabrication
Posted: Fri Oct 02, 2009 9:19 am
by vegaracer
I think that may be to pretty to use.

Re: Dash fabrication
Posted: Fri Oct 02, 2009 6:11 pm
by BracketNova
I don't know what that is...but i am darn impressed with the workmanship. and hey, it's got a wheel on it, thats super cool right there
Re: Dash fabrication
Posted: Tue Oct 06, 2009 12:57 pm
by pro70z28
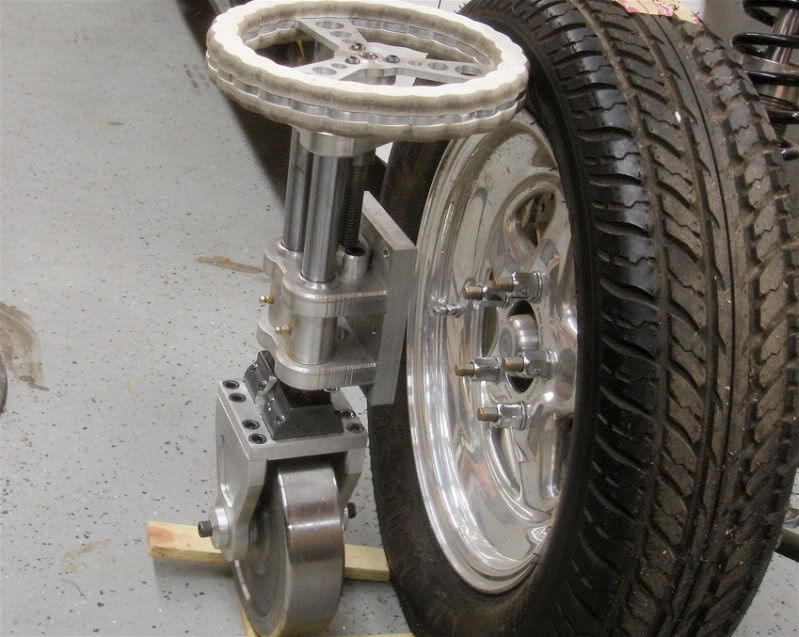
spaz109. It'll be an English wheel someday. Got a little more done last night. Parts for the top anvil.
vegaracer, I hope I get to use it on the "Z" one of these days. I'll be sure to keep it clean.

Re: Dash fabrication
Posted: Tue Oct 06, 2009 11:46 pm
by BracketNova
Gotcha
Re: Dash fabrication
Posted: Wed Oct 07, 2009 10:27 pm
by pro70z28
I finished the top anvil assembly tonight. Time to start welding up the frame.
Re: Dash fabrication
Posted: Wed Oct 07, 2009 10:54 pm
by dakster
All that I see in this guy is "Look at all of the cool tools that I have" Show-off. Your car would probably be finished if you did not spend 3 hours per day taking pics and posting them here. Back to work!